Guitar
Over the last couple of months, I have made an electric guitar for the first time. Actually most of those two months I wasn’t doing anything apart from waiting for parts to arrive. I was mostly buying parts from China and they were all held up by Covid-19 delays.
The guitar was based on a Fender Telecaster design, since plans and parts are fairly easy to get hold of and since I like the look of it. It would have been simple enough to have changed the shape of the body and otherwise used the same hardware and general layout, but I just did an exact copy.
Step 1: Buy components from AliExpress
The price of components purchased in the UK can really add up. However they take ages to come, so do this step first probably at least 6 weeks before you want to finish the build. I picked up all the basic components there:
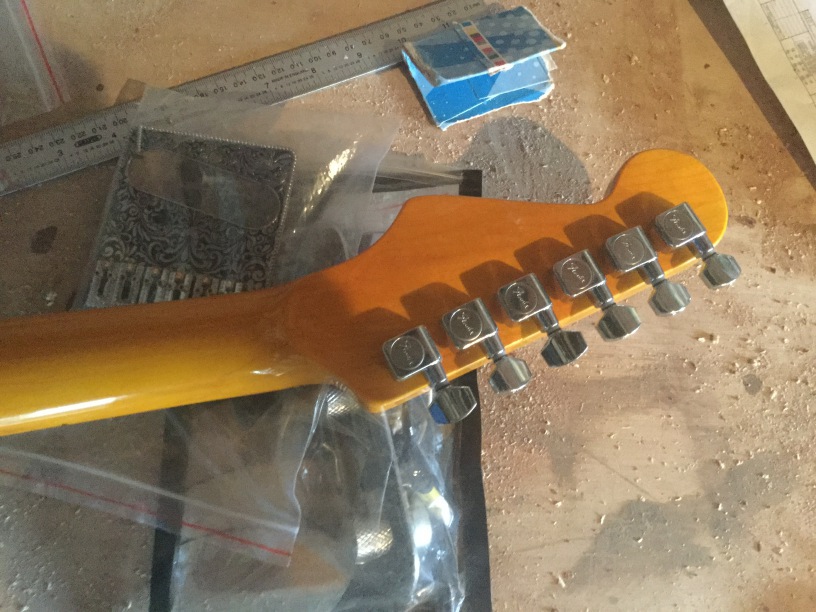
- replacement neck for Stratocaster (compatible with Telecaster, main difference is the shape of the headstock),
- input jack
- bridge
- prewired control plate
- string tree
- machine heads
- neck plate
- scratch plate
- string ferrules
- strap pegs
- strap
You can build your own neck, but it requires specialised tools and techniques so I skipped that so that I could get a good result. Maybe try that another time.
Step 2: Body
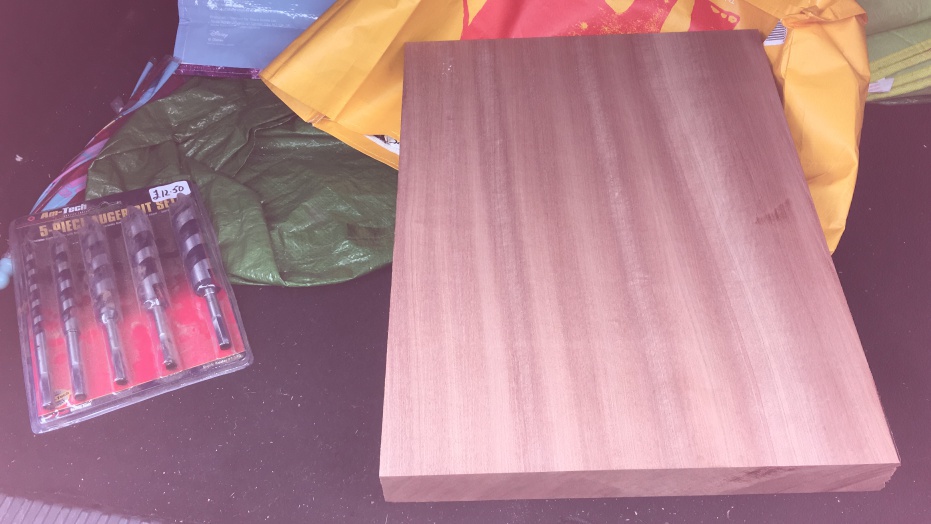
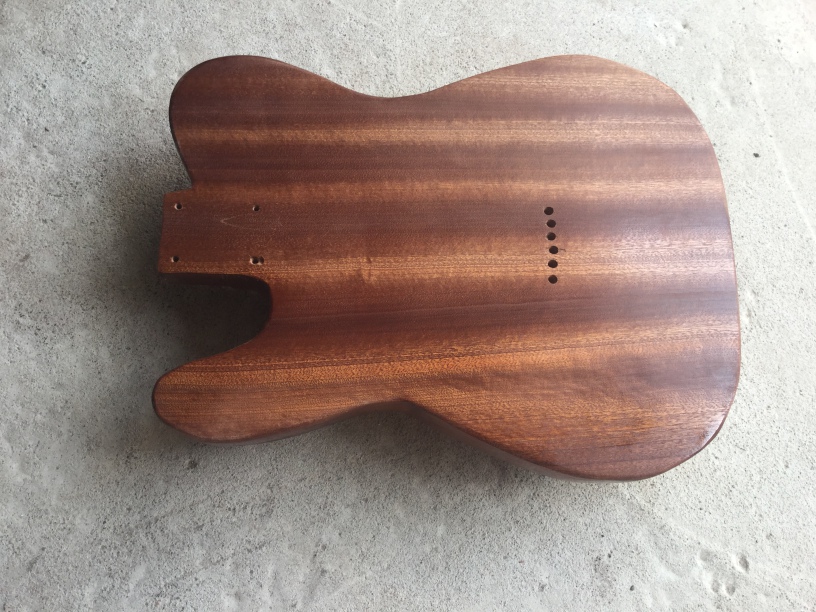
I bought the wood for the body from a brilliant wood shop in Glasgow, Reid Timber. As far as I know there is nowhere like this shop or around Edinburgh. It is near Celtic Park so I combined a home game (I didn’t know at the time it would be the last one of the season) with a visit to the shop. The shopkeeper doesn’t necessarily recommend visiting the shop for guitar wood, most of which is not on display, but I wanted to see the different types of possible wood. For example, I don’t really know what “swamp ash” or “sapele” looks like. On the day they had sapele and I think walnut on display. The walnut was much more expensive and I think I read it is hard to work with normal tools, so I got the Sapele at £35 (I think). It was a single piece. Not sure if that is a great wood or not, but certainly many guitar makers are using that and it looks nice. The body blank was surprisingly cheap I thought, taking into account the quality.
The shop in general is fantastic, I have never seen anything like this range of wood anywhere. I will definitely be making all my future wood projects using wood from this shop.
I think that is definitely good value compared to other suppliers like guitarbuild.co.uk where a mahogany 2 piece blank is £77 whereas I got a 1 piece for less than half that.
You can also buy pre-cut guitar bodies with the cavities already made for the electronics and component holes drilled. I wanted to be able to say I built this guitar, rather than assembled it, so that was not for me. Also it would substantially increase the cost; a premade mahogany Telecaster body would be around £180. However if you don’t have tools like a jigsaw, router, files, drill, etc. then it would definitely be cost effective to go pre-made, since those tools could easily cost £250 to buy.
To figure out where to cut, I used plans from Electric Herald specifically this plan. I have backed up the plans here in case they disappear from the internet.
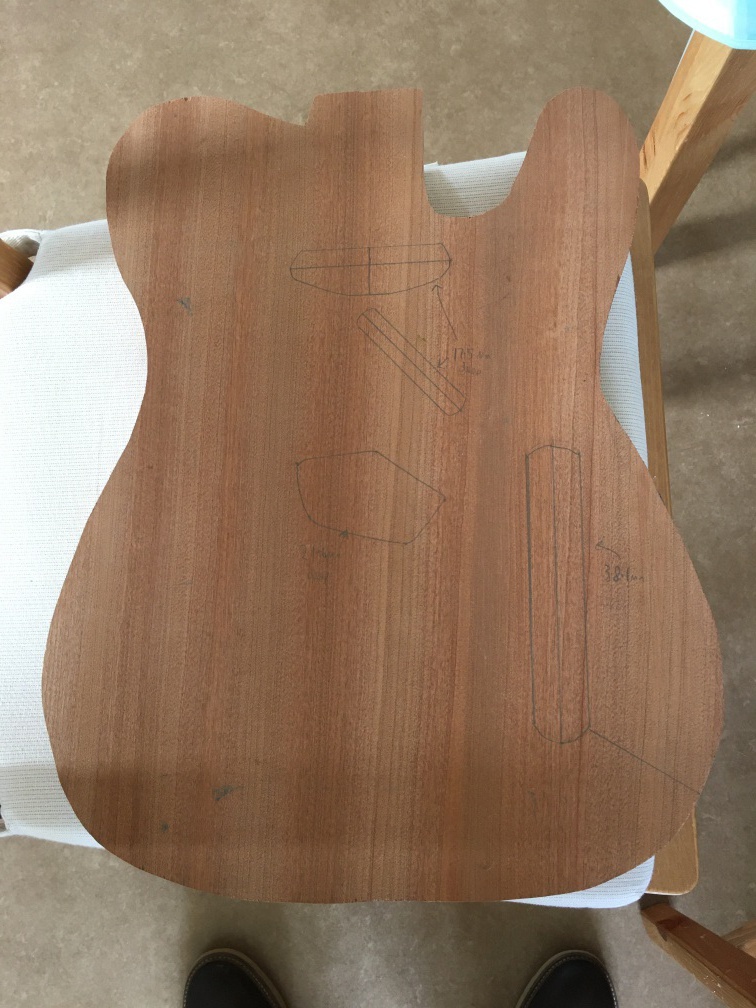
If you have a large format printer then you could print the template out at 1:1, cut round it and then draw round it onto the wood. I don’t so I sellotaped big paper to a big monitor and traced it with a pencil at 100% scale. Then I cut it out and traced round it onto the piece of wood (including marking the positions of cavities to make with the router).
I cut round it with a jigsaw. To cut the body, professional guitar makers will use a router and a template. I didn’t buy a template and I didn’t make one because I am not sure I’ll make a second guitar. I had to buy special Bosch Hardwood jigsaw blades, after realised the wood was too thick and hard for the blade I already had.
Eventually I had a nice body shape which I filed to get it roughly right and with rounded edges.
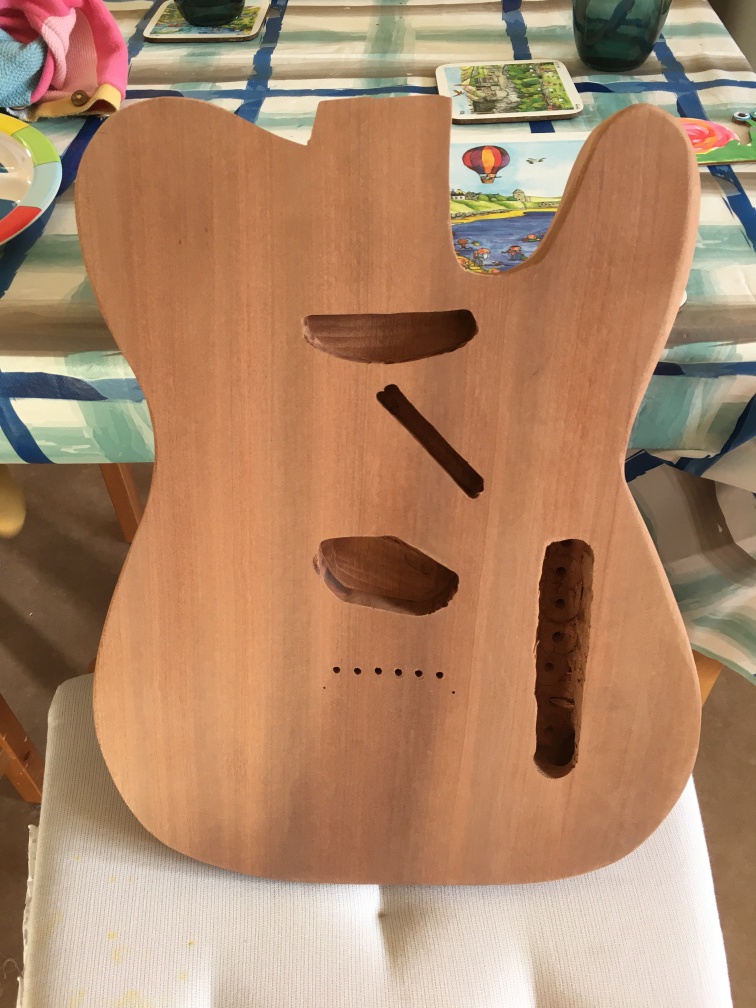
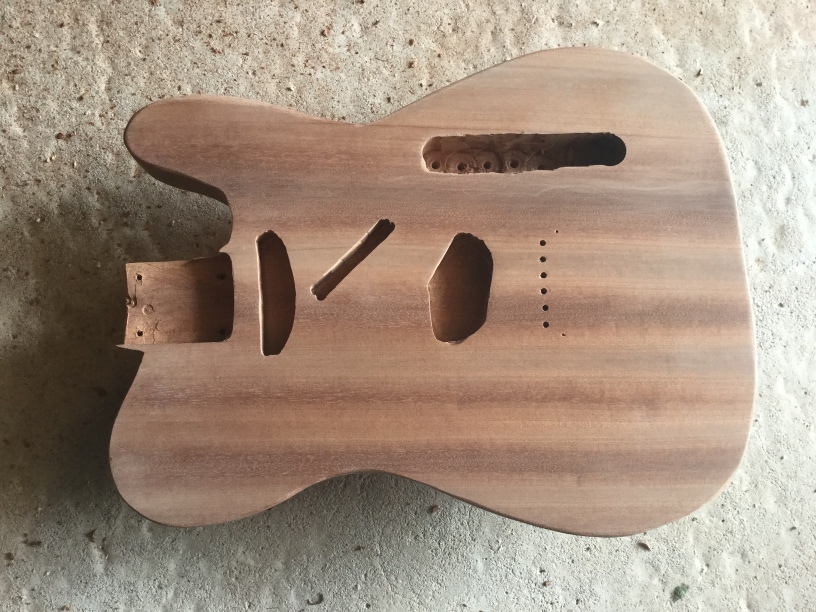
Next I routed out the holes for the pickups and control plate. It needs to be quite accurate because it needs to be deep enough to take the parts but not so deep you accidentally make a hole in the back.
This is when I made a frustrating mistake drilling the holes for the strings to go through. I drilled them squint meaning the string ferrules on the back don’t line up. But it is only a cosmetic issue, the strings go through the holes fine and arrive at the bridge as they should.
Step 3: Neck
I was aware from the very beginning that fitting the neck was the difficult part and that was where I could potentially make a catastrophic mistake. If you put it on squint then it affects ergonomics. If it is too deep into the body, then the strings will be too far off the fretboard. If it’s too far off the body then the strings will be pressed on the the fretboard. If it’s too close to the bridge or too far away then the guitar will be out of tune. There is a little bit of tolerance because the bridge is adjustable, but it’s only a few millimetres in each direction.
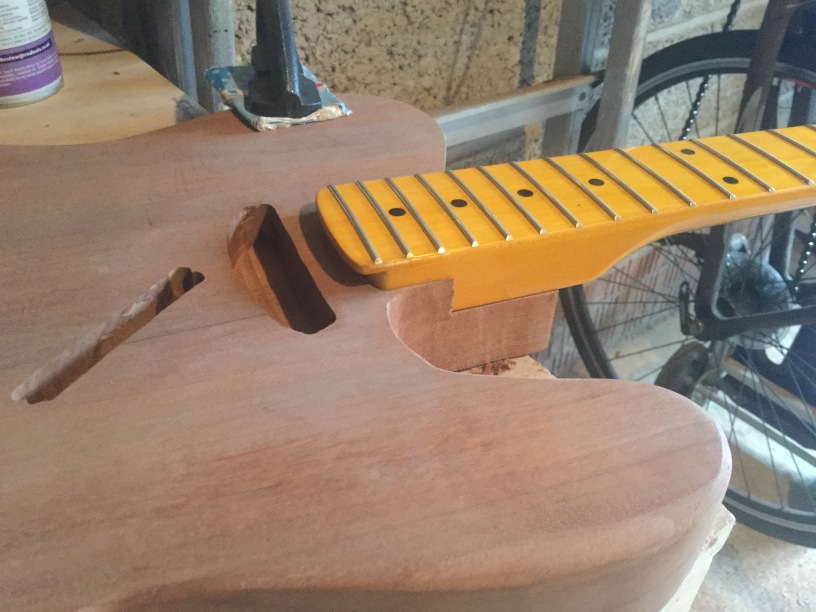
So the next thing to do was the route the neck pocket. I cut it with extreme trepidation, but it eventually fitted and looked straight.
I attached the bridge, put on the machine heads and a single string… and to my delight I could play a tune on one string! I even put the rest of the strings on and played it a bit, I was very happy at this point because I had assumed that this would require all types of heroics with a chisel to get it to fit and that I might have to put matchsticks in to get it to work.
Step 4: Finish
Then lots of sanding. I started at 100 grit and eventually stopped at 400 grit.
There were a LOT of options for finish, see Manchester Guitar Tech for lots of great detailed blog posts with advice on finish. At least:
- Just oil
- Laquer (various kinds)
- Stain plus laquer
- Opaque self-coloured laquer
I didn’t stain it because I wasn’t sure how stain would interact with the reddish wood. I also didn’t want to cover up the wood grain. I finally went with first applying sanding sealer followed by laquer, both from a spray can. I think using a spray can was a good move because it make it easier to avoid lumpy bits of varnish. The stuff I got was from Chestnut Products, much cheaper direct from the company than on Amazon Prime (remember to check direct with the manufacturer or shop around on the internet, whenever you’re purchasing!)
Step 5: Hardware and pickups
I got a pre-wired control plate, I felt that my electronics knowledge was no up to picking all these components individually. A control plate consists of a volume control, tone control and “3 way” switch.
I was very confused by the switch, because it seemed to have 5 positions. Eventually I found this diagram
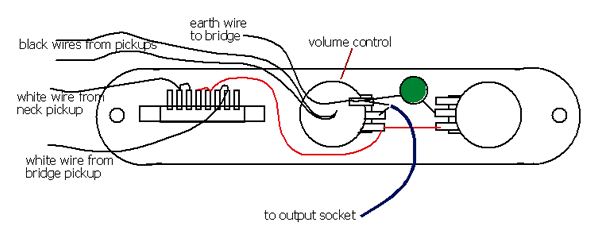
at this page.
That diagram exactly describes the wiring required. I spent half an hour using a multimeter to verify what would happen with the switch in various positions.
My wiring and soldering was completely shoddy, it took all morning but eventually I got it to work. I am not going to recommend any resources on soldering, because I can’t tell which ones were good and which are bad.
Costs
To put together a guitar using parts from a guitar supplier would be much more expensive, albeit I splurged on the pickups. I could have bought a Chinese off-brand and it probably would have sounded similar to my untrained ear.
| Item | Cost | Notes |
|---|---|---|
| Strap | £9.69 | https://www.aliexpress.com/item/4000234714181.html?spm=a2g0s.9042311.0.0.5e554c4doGQo2M |
| Output jack | £2.60 | https://www.aliexpress.com/item/New-High-Quality-Metal-Silver-6-35mm-1-4-Jack-Plug-Socket-Output-Plate-For-Electric/32801316568.html?spm=a2g0s.9042311.0.0.5e554c4doGQo2M |
| String ferrules | £1.37 | https://www.aliexpress.com/item/6pcs-Electric-Guitar-Bridge-Guitar-String-Mounting-Ferrules-Bushing-string-retainer-Balck-Gold-Chrome/4000617361684.html?spm=a2g0s.9042311.0.0.5e554c4doGQo2M |
| Output jack | £2.60 | https://www.aliexpress.com/item/New-High-Quality-Metal-Silver-6-35mm-1-4-Jack-Plug-Socket-Output-Plate-For-Electric/32801316568.html?spm=a2g0s.9042311.0.0.5e554c4doGQo2M |
| String tree | £0.93 | https://www.aliexpress.com/item/1-set-3-colors-Electric-Guitar-Strings-Retainer-Metal-String-Tree-Guide-Retainer-for-Guitar-Bass/33008743797.html?spm=a2g0s.9042311.0.0.5e554c4doGQo2M |
| String ferrules | £1.37 | https://www.aliexpress.com/item/6pcs-Electric-Guitar-Bridge-Guitar-String-Mounting-Ferrules-Bushing-string-retainer-Balck-Gold-Chrome/4000617361684.html?spm=a2g0s.9042311.0.0.5e554c4doGQo2M |
| Bridge and prewired control plate | £23.50 | https://www.aliexpress.com/item/FLEOR-6-String-Electric-Guitar-Tremolo-Bridge-Tele-Pre-wired-Control-Plate-Set-Tele-Prewired-Control/32882668300.html?spm=a2g0s.9042311.0.0.5e554c4doGQo2M |
| Strap pegs | £0.71 | https://www.aliexpress.com/item/2Pcs-Guitar-Strap-Lock-Locking-Pegs-Pin-Metal-End-Strap-Button-for-Acoustic-Classical-Electric-Bass/1000005709791.html?spm=a2g0s.9042311.0.0.5e554c4doGQo2M |
| Machine heads | £6.43 | https://www.aliexpress.com/item/6-in-Line-Sealed-Guitar-Tuners-2-Pin-Key-Tuning-Pegs-Keys-Machine-Heads-Set-for/32998818890.html?spm=a2g0s.9042311.0.0.5e554c4doGQo2M |
| Pick guard | £2.74 | https://www.aliexpress.com/item/3-Ply-Tele-Style-Electric-Guitar-Pick-Guard-Scratch-Plate-Fit-Telecaster-Black-high-quality-Guitar/32950432025.html?spm=a2g0s.9042311.0.0.27424c4dzFBfO6 |
| Neck plate | £2.51 | https://www.aliexpress.com/item/Chrome-Electric-Guitar-Neck-Plate-Neck-Plate-Fix-Tele-TL-Electric-Guitar-Neck-Joint-Board/4000403151929.html?spm=a2g0s.9042311.0.0.27424c4dzFBfO6 |
| Seymour Duncan Hot Rails pickups | £159.95 | http://www.hotroxuk.com/seymour-duncan-hot-rails-for-tele-matched-set-sthr-1.html |
| Maple Neck | £39.84 | https://www.ebay.co.uk/itm/254315249789 |
| Sanding sealer and lacquer | £20.70 | http://chestnutproducts.co.uk/ |
| TOTAL | £274.94 |
Let’s not talk about the new tools I bought because that would make the price seem a bit ridiculous. I had to get a new drill/driver and soldering kit.
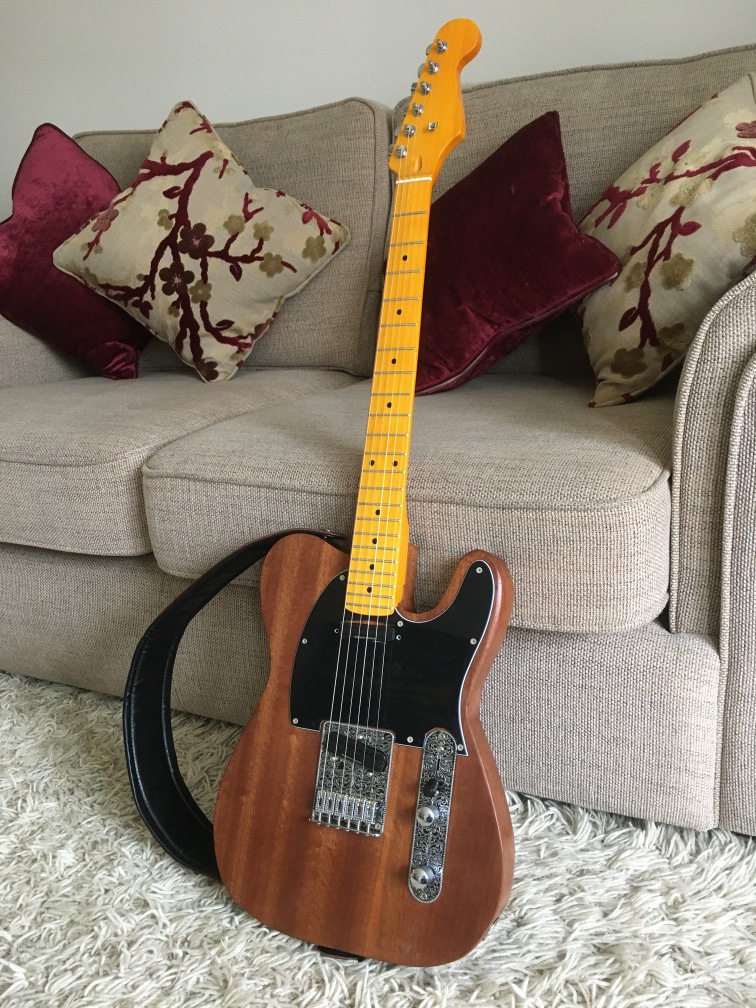
Conclusion
This has been a fantastic hobby for the last couple of months. I think I’ve made something that will always be special to me. I am very happy with it and it plays just as well as my Epiphone Les Paul. If anything it is a bit too similar, because with twin humbuckers it really sounds quite similar. Maybe next time I would make something totally different, e.g. a more standard single coil twangy Telecaster or a out and out metal guitar with pointy edges and active pickups.